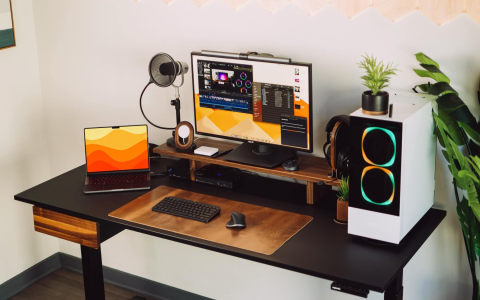
Okay, so I’ve been wanting to revamp my research setup for a while now. It was just a mess – papers everywhere, notes scattered, and I could never find anything when I needed it. I finally decided to buckle down and “plate up” my research desk, as I like to call it. Here’s how I tackled it:
Step 1: The Purge
First things first, I cleared everything off my desk. EVERYTHING. It was kinda scary seeing it all piled up, but it was necessary. I then went through each item, one by one, and asked myself: “Do I really need this?”
- Old drafts? Trashed.
- Notes from months ago that I couldn’t even decipher? Gone.
- Random pens that didn’t even work? Bye-bye.
This part took the longest, honestly. It’s hard to let go of stuff, even if it’s just paper. But I was ruthless (mostly). I ended up with a much smaller pile of things that were actually important.
Step 2: Organize the Essentials
Now that I had only the essential stuff, I needed a way to organize it. I grabbed some basic supplies:
- File folders: Different colors for different projects.
- A desk organizer: For pens, sticky notes, and other small items that were taking space before.
- A notebook:Dedicated solely to my research notes and I write on it every time.
I started sorting everything into the folders. I labelled each one clearly, so I wouldn’t have to guess what was inside later. The desk organizer was a lifesaver – no more rummaging around for a pen!
Step 3: Digital Declutter
My physical desk wasn’t the only problem. My computer desktop was also a disaster zone. I had files scattered everywhere, downloads I’d forgotten about, and it was just overwhelming.
I created folders on my desktop for each project, mirroring the physical folders I’d set up. Then, I started dragging and dropping files into their appropriate homes. I also went through my downloads folder and deleted anything I didn’t need anymore.
It was a simple step, but it made a huge difference. My computer felt so much cleaner and more organized.

Step 4: The Final Touches
With everything organized, I added a few final touches to make the space more inviting and I did:
- Put a small plant on my desk: Made it look a little less sterile.
- Adjust my lighting: Got a better desk lamp.
- Added a comfortable chair: This should be obvious, but I invested into it.
These small things made the desk feel less like a workspace and more like a place where I actually wanted to spend time.
Step 5: Keeping It Clean
I did make an effort to put things back where they belonged after I was done using them and spending a few minutes at the end of each day tidying up, throwing away any unnecessary papers, and making sure my digital files were in order.
The whole process took a few hours, but it was so worth it. My research desk is now a functional, organized, and even enjoyable space. I’m actually more productive, and I don’t waste time searching for things anymore. It’s amazing what a little decluttering and organizing can do!


